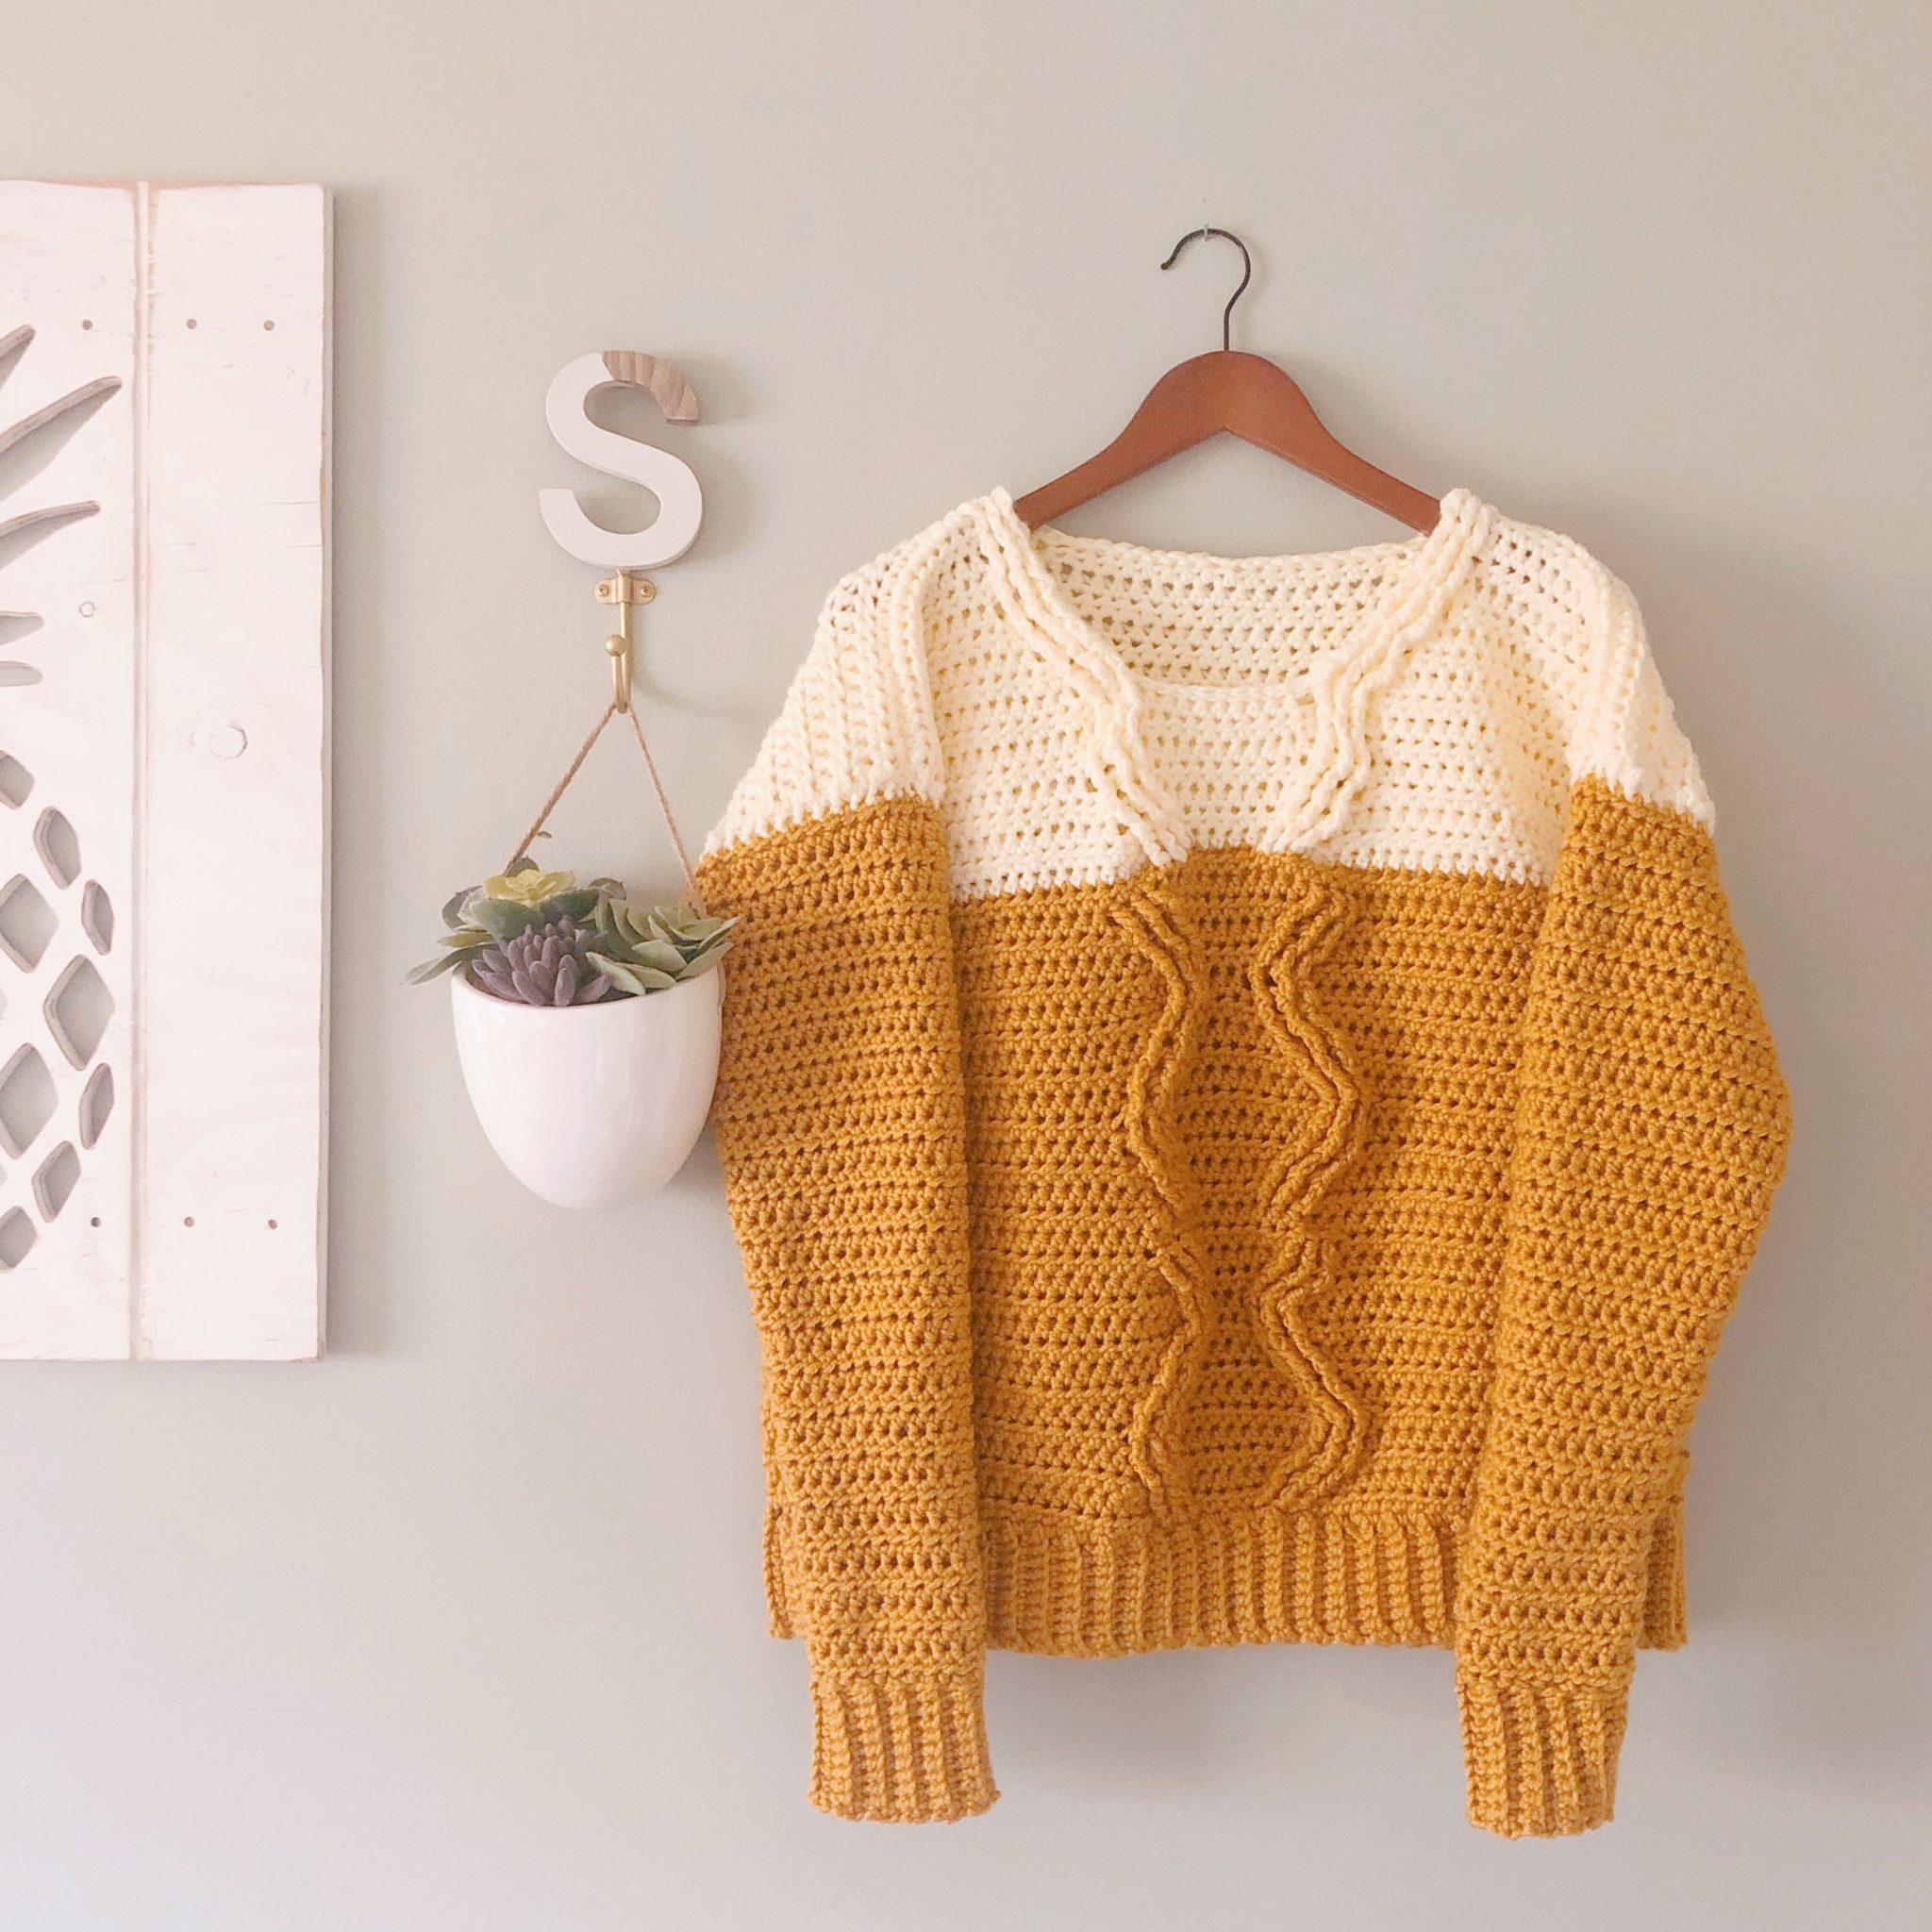
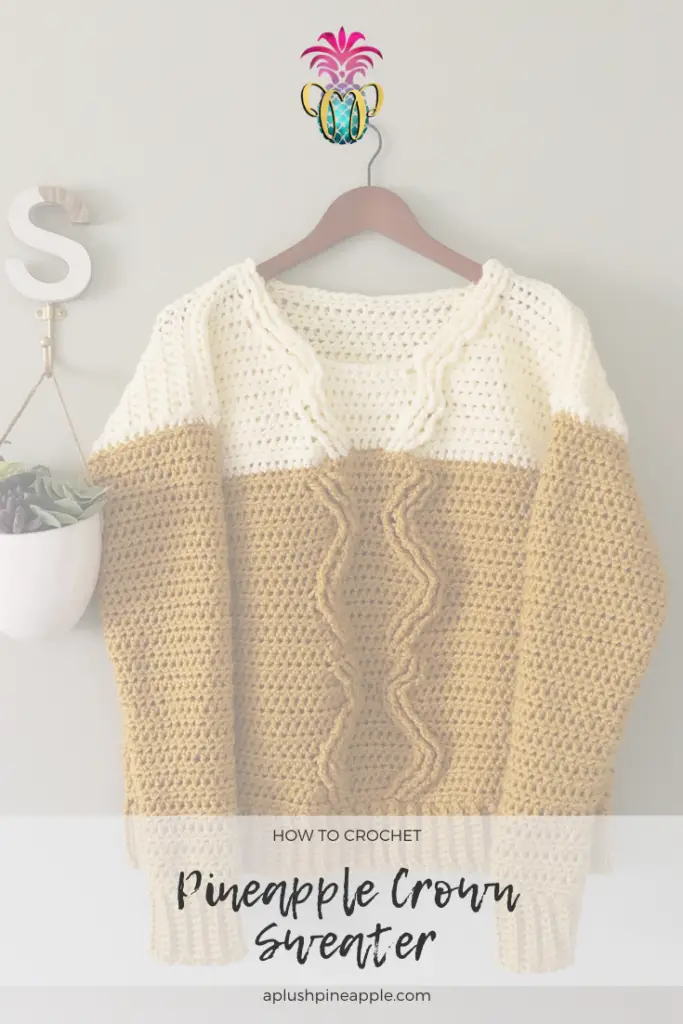
Crochet a bulky cable sweater with subtle pineapple details worked into the cables. This sweater features long sleeve length ending at the thumb and a long tunic-style hem length.
“Home is the comfiest place to be.”
Winnie the Pooh
Don’t you ever wish you could wear a blanket on chilly mornings?
Me! Me! I do! I am a sit-by-the-space-heater-all-day-wearing-a-snuggie-and-extra-thick-slipper-socks kind of person. Being cold is the WORST! For that reason, I wanted to design an extra-cozy over-sized bulky cable sweater so I could be warm and cozy.
Warm and Cozy
When I say that this bulky cable sweater is cozy, that is an understatement. I literally feel cold the moment I pull it off. It is PERFECT for snuggling up on these lingering cold days when you just can’t get warm.
The over-sized fit makes this bulky cable sweater just as comfortable as it is cozy. It has plenty of room for lounging and relaxing. The fit is very similar to that of a sweatshirt or hoodie. In other words, it doesn’t get any more comfortable than that!
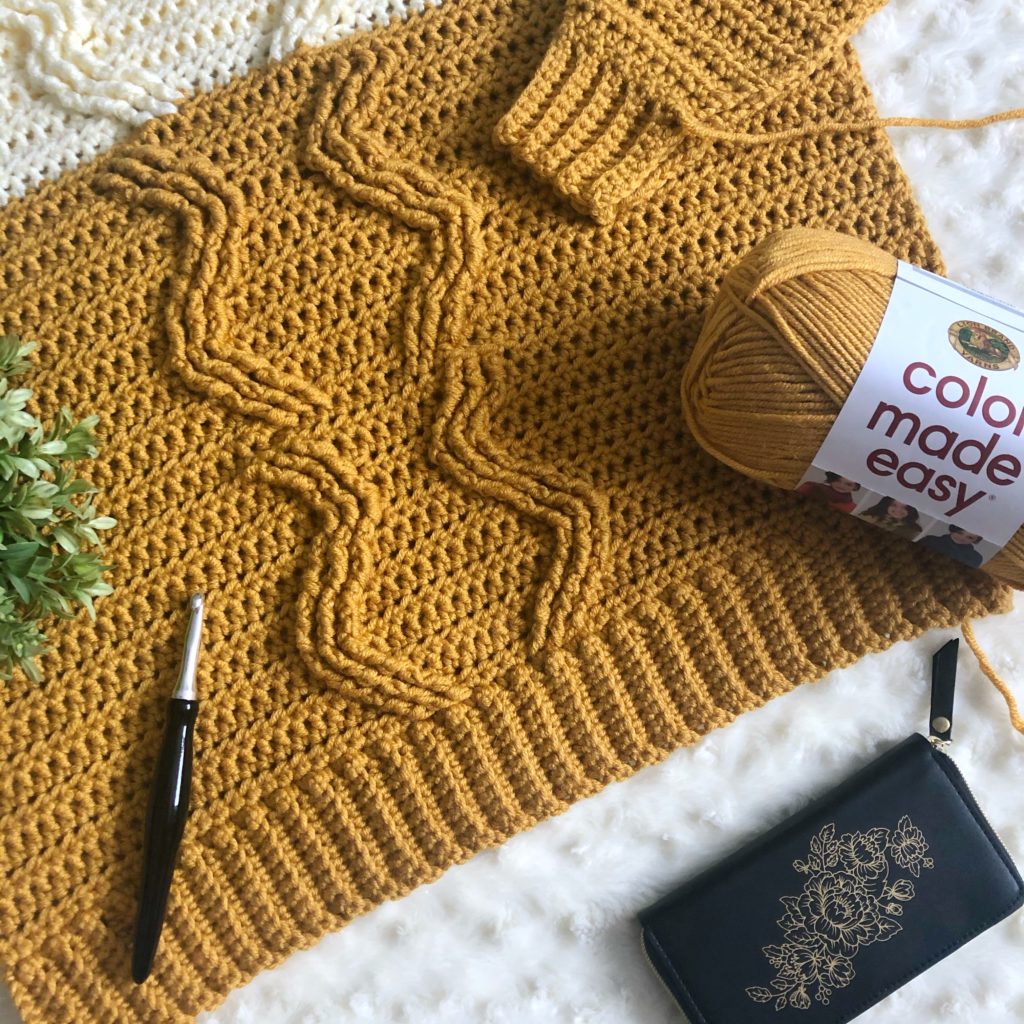
The Perfect Yarn
When I was looking for a bulky weight yarn for this project, I knew immediately that I wanted to use Lion Brand Color Made Easy. I have had my eye on it for quite some time, and now I finally had a chance to work something up with it! It works up like a dream, and there are so many color options! It’s the perfect choice of yarn for a bulky cable sweater!
So, if you love a quick garment project using bulky weight yarn that will keep you cozy and comfy, proceed to below pattern. Let’s face it, we all need a wardrobe item that just…
…feels like home.
Skill Level – Intermediate
Materials
Disclaimer: This post contains affiliate links to the products used in this project. If you make a purchase through any of these links, we will get a small commission at no additional cost to you.
- Size K10.5/6.5mm crochet hook and L11/8.00mm crochet hook
- Bulky weight yarn – I used Lion Brand Color Made Easy in Mineral Yellow and Alabaster
- Approximately 610 (710, 820, 910, 1,160, 1,415) yards main color
- Approximately 160 (180, 210, 230, 295, 360) yards contrasting color
- Tapestry needle
- Scissors
Abbreviations
- CH – Chain
- SC – Single crochet
- HDC – Half double crochet
- SK – Skip
- FP TR – Front post treble crochet
- BP TR – Back post treble crochet
- FP DC – Front post double crochet
- BP DC – Back post double crochet
- SL ST – Slip stitch
- FO – Finish off
- WS – Wrong side
- RS – Right side
Notes
- Gauge: 4” x 4” = 10 HDC x 9 Rows
- BE SURE TO CHECK YOUR GAUGE – Gauge is crucial in this project in order to ensure fit.
- Finished measurements are as follows:
- XS – 33” hip, 41” bust, 24” length
- SM – 36” hip, 44” bust, 24” length
- M – 39” hip, 47” bust, 24” length
- L – 42” hip, 50” bust, 25” length
- XL – 46 ½” hip, 54 ½” bust, 25” length
- XXL – 51” hip, 59” bust, 25” length
- This bulky cable sweater is designed with a long hem (tunic length) and sleeve length to the thumbs. There is an edit in the pattern if you wish your sleeves to stop at the wrists.
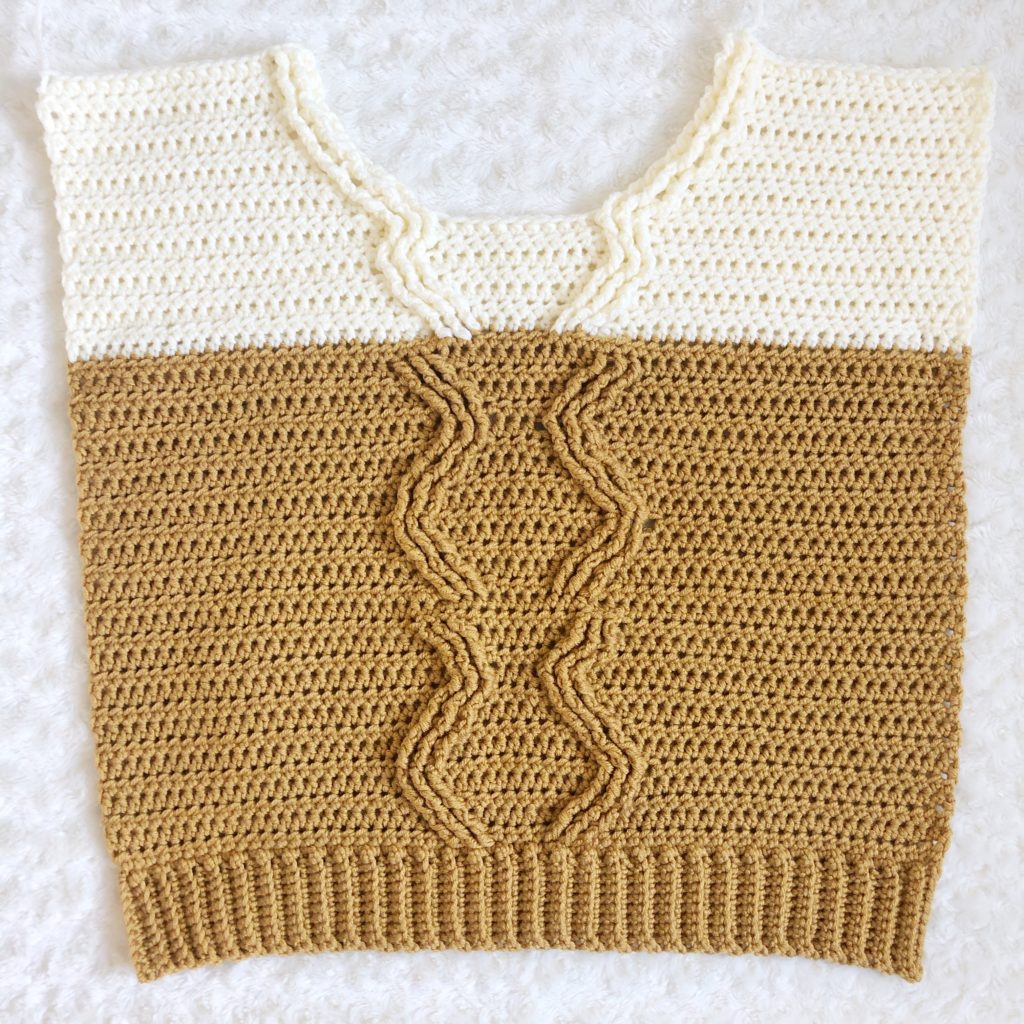
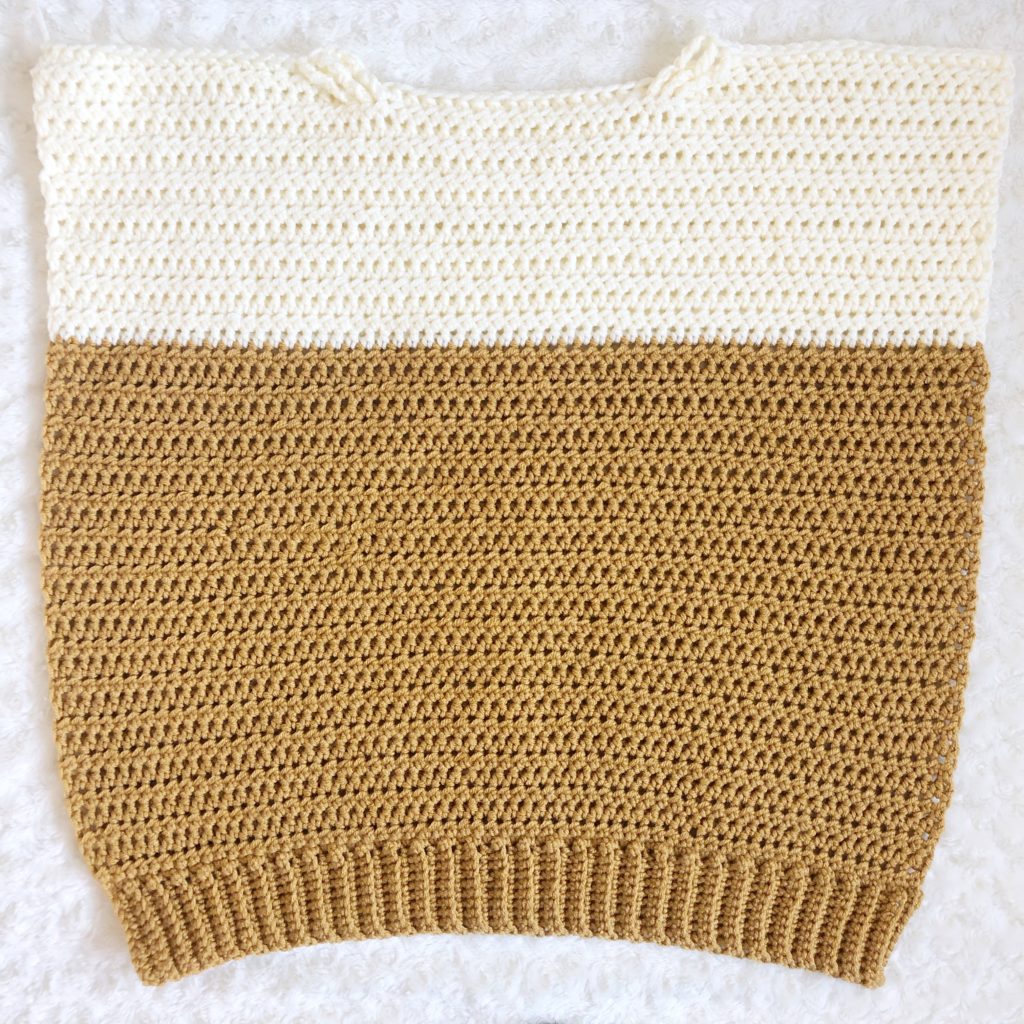
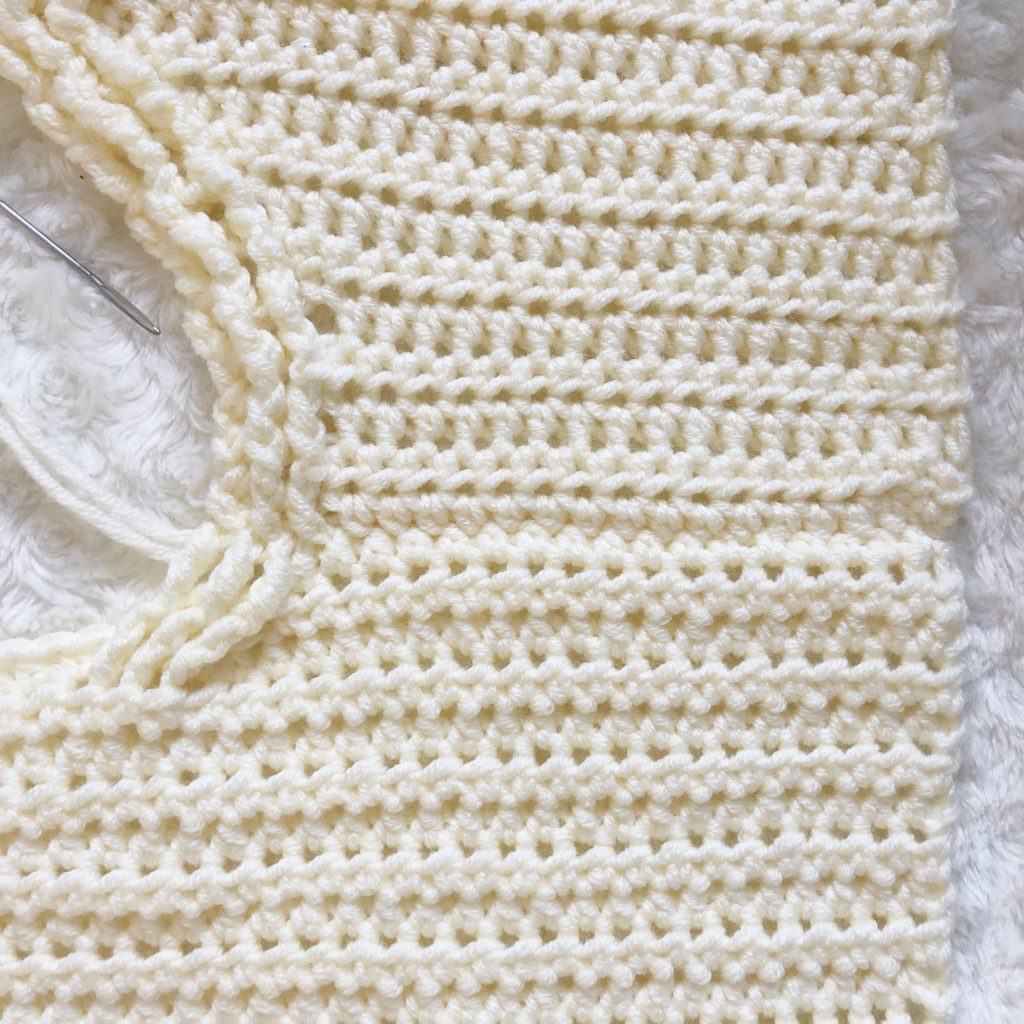
- This garment is made from two rectangular panels that are crocheted as flat pieces from the bottom up back and forth in rows. The panels are then seamed together at the shoulders and on the sides. Yarn is joined to the armholes and the sleeves are crocheted back and forth in rows to the wrists and then seamed.
- Beginning CH stitches do not count as a stitch.
- Size changes are in parentheses XS (S, M, L, XL, XXL) respectively.
- This garment is designed to fit the hip with a baggy fit around the waist and bust. There is a range of 10-13 inches of positive ease in the bust measurements.
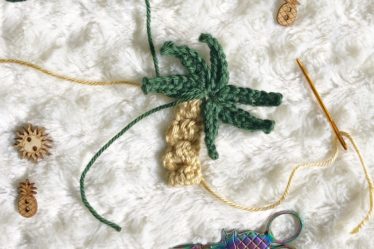
- The Pineapple Cable stitch is a stitch pattern that I have designed. A video tutorial for completing rows 1-5 in a sample-sized swatch is included in this blog post below.
- If you have any difficulty completing this project and would like support, please email me at theplushpineappleshop@gmail.com.
Special Stitches
Front Post Treble Crochet – FP TR
- YO 2x, insert hook around designated post from RS to WS
- YO, pull up a loop (4 loops on hook)
- YO, pull through two loops 3x
Back Post Treble Crochet – BP TR
- YO 2x, insert hook around designated post from WS to RS
- YO, pull up a loop (4 loops on hook)
- YO, pull through two loops 3x
Pattern
Front Body Panel
Ribbing
Use size K10.5/6.50mm crochet hook.
*Work the ribbing in the back loop only.*
Row 1: CH 11, SC in 2nd CH from hook and in every CH across. (10 SC)
Row 2-49 (53, 57, 61, 67, 73): CH 1, turn, SC BLO in every stitch across. (10 SC)
Body
Row 1 (RS): CH 1, turn the work so that you can work down the length of the ribbing, place a SC in the end of each row of the ribbing. Be sure to go into the last stitch space and not just around the CH 1 on every other row. This is the RS of the work. (49, 53, 57, 61, 67, 73) These will be the stitch counts for the remainder of the panel until you reach the neckline.
Use size L11/8.00mm crochet hook.
Row 2: CH 1, turn, HDC in every stitch across.
Row 3: CH 1, turn, 18 (20, 22, 24, 27, 30) HDC, working around the posts from Row 1, SK 2, work FPTR around the next 3 SC, on main row, SK 3 stitches from the last HDC worked, 7 HDC, working around the posts from Row 1, count back 2 stitches, work FPTR around the next 3 SC, on main row, SK 3 stitches from the last HDC worked, 18 (20, 22, 24, 27, 30) HDC.
Row 4: CH 1, turn, 17 (19, 21, 23, 26, 29) HDC, BPTR around the 3 TR posts from previous row, on main row, SK 3 stitches from the last HDC worked, 9 HDC, BPTR around the 3 TR posts from previous row, on main row, SK 3 stitches from the last HDC worked, 17 (19, 21, 23, 26, 29) HDC.
Row 5: CH 1, turn, 16 (18, 20, 22, 25, 28) HDC, FPTR around the 3 TR posts from previous row, on main row, SK 3 stitches from the last HDC worked, 11 HDC, FPTR around the 3 TR posts from previous row, on main row, SK 3 stitches from the last HDC worked, 16 (18, 20, 22, 25, 28) HDC.
Row 6: CH 1, turn, 15 (17, 19, 21, 24, 27) HDC, BPTR around the 3 TR posts from previous row, on main row, SK 3 stitches from the last HDC worked, 13 HDC, BPTR around the 3 TR posts from previous row, on main row, SK 3 stitches from the last HDC worked, 15 (17, 19, 21, 24, 27) HDC.
Row 7: CH 1, turn, 16 (18, 20, 22, 25, 28) HDC, FPTR around the 3 TR posts from previous row, on main row, SK 3 stitches from the last HDC worked, 11 HDC, FPTR around the 3 TR posts from previous row, on main row, SK 3 stitches from the last HDC worked, 16 (18, 20, 22, 25, 28) HDC.
Row 8: CH 1, turn, 17 (19, 21, 23, 26, 29) HDC, BPTR around the 3 TR posts from previous row, on main row, SK 3 stitches from the last HDC worked, 9 HDC, BPTR around the 3 TR posts from previous row, on main row, SK 3 stitches from the last HDC worked, 17 (19, 21, 23, 26, 29) HDC.
Row 9: CH 1, turn, 18 (20, 22, 24, 27, 30) HDC, FPTR around the 3 TR posts from previous row, on main row, SK 3 stitches from the last HDC worked, 7 HDC, FPTR around the 3 TR posts from previous row, on main row, SK 3 stitches from the last HDC worked, 18 (20, 22, 24, 27, 30) HDC.
Row 10: CH 1, turn, 19 (21, 23, 25, 28, 31) HDC, BPTR around the 3 TR posts from previous row, on main row, SK 3 stitches from the last HDC worked, 5 HDC, BPTR around the 3 TR posts from previous row, on main row, SK 3 stitches from the last HDC worked, 19 (21, 23, 25, 28, 31) HDC.
Row 11: CH 1, turn, 20 (22, 24, 26, 29, 32) HDC, FPTR around the 3 TR posts from previous row, on main row, SK 3 stitches from the last HDC worked, 3 HDC, FPTR around the 3 TR posts from previous row, on main row, SK 3 stitches from the last HDC worked, 20 (22, 24, 26, 29, 32) HDC.
Row 12: CH 1, turn, 19 (21, 23, 25, 28, 31) HDC, BPTR around the 3 TR posts from previous row, on main row, SK 3 stitches from the last HDC worked, 5 HDC, BPTR around the 3 TR posts from previous row, on main row, SK 3 stitches from the last HDC worked, 19 (21, 23, 25, 28, 31) HDC.
Row 13: CH 1, turn, 18 (20, 22, 24, 27, 30) HDC, FPTR around the 3 TR posts from previous row, on main row, SK 3 stitches from the last HDC worked, 7 HDC, FPTR around the 3 TR posts from previous row, on main row, SK 3 stitches from the last HDC worked, 18 (20, 22, 24, 27, 30) HDC.
Row 14: CH 1, turn, 17 (19, 21, 23, 26, 29) HDC, BPTR around the 3 TR posts from previous row, on main row, SK 3 stitches from the last HDC worked, 9 HDC, BPTR around the 3 TR posts from previous row, on main row, SK 3 stitches from the last HDC worked, 17 (19, 21, 23, 26, 29) HDC.
Row 15: CH 1, turn, 16 (18, 20, 22, 25, 28) HDC, FPTR around the 3 TR posts from previous row, on main row, SK 3 stitches from the last HDC worked, 11 HDC, FPTR around the 3 TR posts from previous row, on main row, SK 3 stitches from the last HDC worked, 16 (18, 20, 22, 25, 28) HDC.
Size XS, S, M
Row 16-17: CH 1, turn, HDC in each stitch across.
Row 18: CH 1, turn, 18 (20, 22, 24, 27, 30) HDC, working around the posts from Row 16, SK 2, work BPTR around the next 3 HDC posts, on main row, SK 3 stitches from the last HDC worked, 7 HDC, working around the posts from Row 16, count back 2 stitches, work BPTR around the next 3 HDC posts, on main row, SK 3 stitches from the last HDC worked, 18 (20, 22, 24, 27, 30) HDC.
Size L, XL, XXL
Row 16-18: CH 1, turn, HDC in each stitch across.
Row 19: CH 1, turn, 18 (20, 22, 24, 27, 30) HDC, working around the posts from Row 17, SK 2, work FPTR around the next 3 HDC posts, on main row, SK 3 stitches from the last HDC worked, 7 HDC, working around the posts from Row 17, count back 2 stitches, work FPTR around the next 3 HDC posts, on main row, SK 3 stitches from the last HDC worked, 18 (20, 22, 24, 27, 30) HDC.
All Sizes
Repeat Rows 4-15 working FPTR around the posts when on the RS and BPTR around the posts when on the WS.
Yoke
Size XS, S, M
Row 31-32: Repeat Rows 16-17. Change to CC on Row 32.
Row 33: CH 1, turn, 18 (20, 22, 24, 27, 30) HDC, working around the posts from Row 31, SK 2, work FPTR around the next 3 HDC posts, on main row, SK 3 stitches from the last HDC worked, 7 HDC, working around the posts from Row 31, count back 2 stitches, work FPTR around the next 3 HDC posts, on main row, SK 3 stitches from the last HDC worked, 18 (20, 22, 24, 27, 30) HDC.
Size L, XL, XXL
Row 32-34: Repeat Rows 16-18. Change to CC on Row 34.
Row 35: CH 1, turn, 18 (20, 22, 24, 27, 30) HDC, working around the posts from Row 33, SK 2, work FPTR around the next 3 HDC posts, on main row, SK 3 stitches from the last HDC worked, 7 HDC, working around the posts from Row 33, count back 2 stitches, work FPTR around the next 3 HDC posts, on main row, SK 3 stitches from the last HDC worked, 18 (20, 22, 24, 27, 30) HDC.
All sizes
Repeat Rows 4-8 working FPTR around the posts when on the RS and BPTR around the posts when on the WS.
Neckline Left Side
Size XS, S, M
Size XS, S, M
Row 39: CH 1, turn, 16, 18, 20 HDC, SK 1, FPTR around the 3 TR posts from previous row, leave the remainder of the row unworked. (19, 21, 23)
Row 40: CH 1, turn, BPTR around the 3 TR posts from previous row, SK 1, 15, 17, 19 HDC. (18, 20, 22)
Row 41: CH 1, turn, 14, 16, 18 HDC, SK 1, FPTR around the 3 TR posts from previous row. (17, 19, 21)
Row 42: CH 1, turn, BPTR around the 3 TR posts from previous row, SK 1, 13, 15, 17 HDC. (16, 18, 20)
Row 43: CH 1, turn 12, 14, 16 HDC, SK 1, FPTR around the 3 TR posts from previous row. (15, 17, 19)
Row 44: CH 1, turn, BPTR around the 3 TR posts from previous row, SK 1, 11, 13, 15 HDC. (14, 16, 18)
*Important: Note that the cable stitches switch to DC rather than TR from here to the end of the panel.*
Row 45: CH 1, turn, 11, 13, 15 HDC, FPDC around the 3 TR posts from previous row. (14, 16, 18)
Row 46: CH 1, turn, BPDC around the 3 DC posts from previous row, 11, 13, 15 HDC. (14, 16, 18)
Row 47: CH 1, turn, 11, 13, 15 HDC, FPDC around the 3 DC posts from previous row. (14, 16, 18)
Row 48: CH 1, turn, BPDC around the 3 DC posts from previous row, 11, 13, 15 HDC. (14, 16, 18)
Leave a 12” tail, cut yarn, FO.
Size L, XL, XXL
Row 41: CH 1, turn, 22, 25, 28 HDC, SK 1, FPTR around the 3 TR posts from previous row, leave the remainder of the row unworked. (25, 28, 31)
Row 42: CH 1, turn, BPTR around the 3 TR posts from previous row, SK 1, 21, 24, 27 HDC. (24, 27, 30)
Row 43: CH 1, turn 20, 23, 26 HDC, SK 1, FPTR around the 3 TR posts from previous row. (23, 26, 29)
Row 44: CH 1, turn, BPTR around the 3 TR posts from previous row, SK 1, 19, 22, 25 HDC. (22, 25, 28)
Row 45: CH 1, turn 18, 21, 24 HDC, SK 1, FPTR around the 3 TR posts from previous row. (21, 24, 27)
Row 46: CH 1, turn, BPTR around the 3 TR posts from previous row, SK 1, 17, 20, 23 HDC. (20, 23, 26)
*Important: Note that the cable stitches switch to DC rather than TR from here to the end of the panel.*
Row 47: CH 1, turn, 17, 20, 23 HDC, FPDC around the 3 TR posts from previous row. (20, 23, 26)
Row 48: CH 1, turn, BPDC around the 3 DC posts from previous row, 17, 20, 23 HDC. (20, 20, 23)
Row 49: CH 1, turn, 17, 20, 23 HDC, FPDC around the 3 DC posts from previous row. (20, 20, 23)
Row 50: CH 1, turn, BPDC around the 3 DC posts from previous row, 17, 20, 23 HDC. (20, 20, 23)
Leave a 16” tail, cut yarn, FO.
Neckline Right Side
Size XS, S, M
Join yarn to the 3rd FPTR on Row 38.
Row 39: CH 3, FPTR around the 3 FPTR posts from previous row, SK 1, 16, 18, 20 HDC. (19, 21, 23)
Row 40: CH 1, turn, 15, 17, 19 HDC, SK 1, BPTR around the 3 TR posts from previous row. (18, 20, 22)
Row 41: CH 1, turn FPTR around the 3 TR posts from previous row, SK 1, 14, 16, 18 HDC. (17, 19, 21)
Row 42: CH 1, turn, 13, 15, 17 HDC, SK 1, BPTR around the 3 TR posts from previous row. (16, 18, 20)
Row 43: CH 1, turn FPTR around the 3 TR posts from previous row, SK 1, 12, 14, 16 HDC. (15, 17, 19)
Row 44: CH 1, turn, 11, 13, 15 HDC, SK 1, BPTR around the 3 TR posts from previous row. (14, 16, 18)
*Important: Note that the cable stitches switch to DC rather than TR from here to the end of the panel.*
Row 45: CH 1, turn, FPDC around the 3 TR posts from previous row, 11, 13, 15 HDC. (14, 16, 18)
Row 46: CH 1, turn, 11, 13, 15 HDC, BPDC around the 3 DC posts from previous row. (14, 16, 18)
Row 47: CH 1, turn, FPDC around the 3 DC posts from previous row, 11, 13, 15 HDC. (14, 16, 18)
Row 48: CH 1, turn, 11, 13, 15 HDC, FPDC around the 3 DC posts from previous row. (14, 16, 18)
Leave a 12” tail, cut yarn, FO.
Size L, XL, XXL
Join yarn to the 3rd FPTR on Row 40.
Row 41: CH 3, FPTR around the 3 TR posts from previous row, SK 1, 22, 25, 28 HDC. (25, 28, 31)
Row 42: CH 1, turn, 21, 24, 27 HDC, SK 1, BPTR around the 3 TR posts from previous row. (24, 27, 30)
Row 43: CH 1, turn FPTR around the 3 TR posts from previous row, SK 1, 20, 23, 26 HDC. (23, 26, 29)
Row 44: CH 1, turn, 19, 22, 25 HDC, SK 1, BPTR around the 3 TR posts from previous row. (22, 25, 28)
Row 45: CH 1, turn FPTR around the 3 TR posts from previous row, SK 1, 18, 21, 24 HDC. (21, 24, 27)
Row 46: CH 1, turn, 17, 20, 23 HDC, SK 1, BPTR around the 3 TR posts from previous row. (20, 23, 26)
*Important: Note that the cable stitches switch to DC rather than TR from here to the end of the panel.*
Row 47: CH 1, turn, FPDC around the 3 TR posts from previous row, 17, 20, 23 HDC. (20, 23, 26)
Row 48: CH 1, turn, 17, 20, 23 HDC, BPDC around the 3 DC posts from previous row. (20, 23, 26)
Row 49: CH 1, turn, FPDC around the 3 DC posts from previous row, 17, 20, 23 HDC. (20, 23, 26)
Row 50: CH 1, turn, 17, 20, 23 HDC, BPDC around the 3 DC posts from previous row. (20, 23, 26)
Leave a 12” tail, cut yarn, FO.
Back Body Panel
Ribbing
Repeat the ribbing instructions from the Front Body Panel section.
Body
Row 1-2: Repeat Row 1-2 from the Front Body Panel section.
Size XS, S, M
Row 3-46: Repeat Row 2 from the Front Body Panel section.
Back Neckline Right Side
Row 47: CH 1, turn, HDC 12, 14, 16, working around the posts from Row 45, SK 2 stitches, work FPTR around the next 3 HDC posts. (15, 17, 19)
Row 48: CH 1, turn, BPTR around the 3 TR posts from previous row, SK 1, HDC 11, 13, 15. (14, 16, 18)
Cut yarn, FO.
Back Neckline Left Side
With the RS facing you, from left to right, count over 16, 18, 20 stitches and join yarn.
Row 47: CH 3, working around the posts from Row 45, count back 2 stitches, work FPTR around the next 3 HDC posts, SK 1, HDC 12, 14, 16. (15, 17, 19)
Row 48: CH 1, turn, HDC 11, 13, 15, SK 1, BPTR around the 3 TR posts from previous row. (14, 16, 18)
Cut yarn, FO.
Size L, XL, XXL
Row 3-48: Repeat Row 2 from the Front Body Panel section.
Back Neckline Right Side
Row 49: CH 1, turn, HDC 18, 21, 24, working around the posts from Row 47, SK 2 stitches, work FPTR around the next 3 HDC posts. (21, 24, 27)
Row 50: CH 1, turn, BPTR around the 3 TR posts from previous row, SK 1, HDC 17, 20, 23. (20, 23, 26)
Cut yarn, FO.
Back Neckline Left Side
With RS facing you, from left to right, count over 22, 25, 28 stitches and join yarn.
Row 49: CH 3, working around the posts from Row 47, count back 2 stitches, work FPTR around the next 3 HDC posts, SK 1, HDC 18, 21, 24. (21, 24, 27)
Row 50: CH 1, turn, HDC 17, 20, 23, SK 1, BPTR around the 3 TR posts from previous row. (20, 23, 26)
Cut yarn, FO.
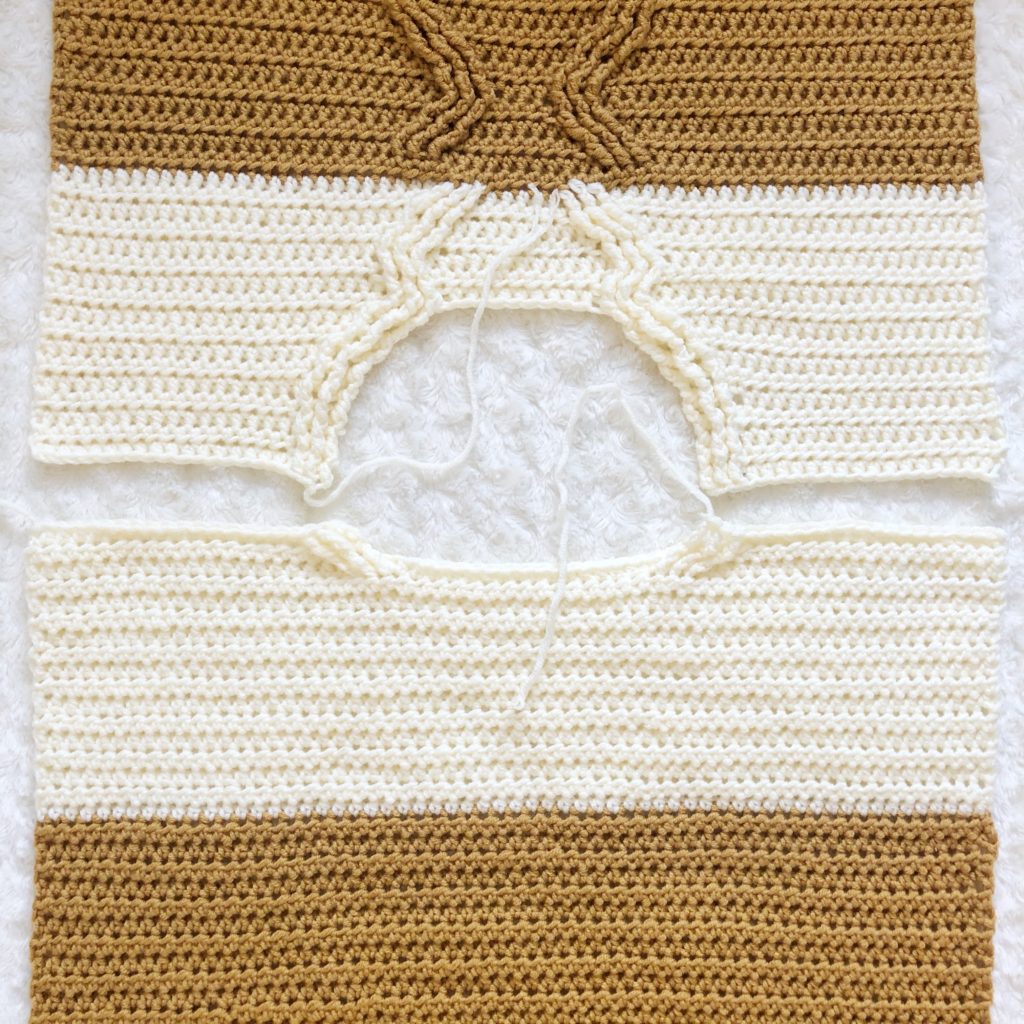
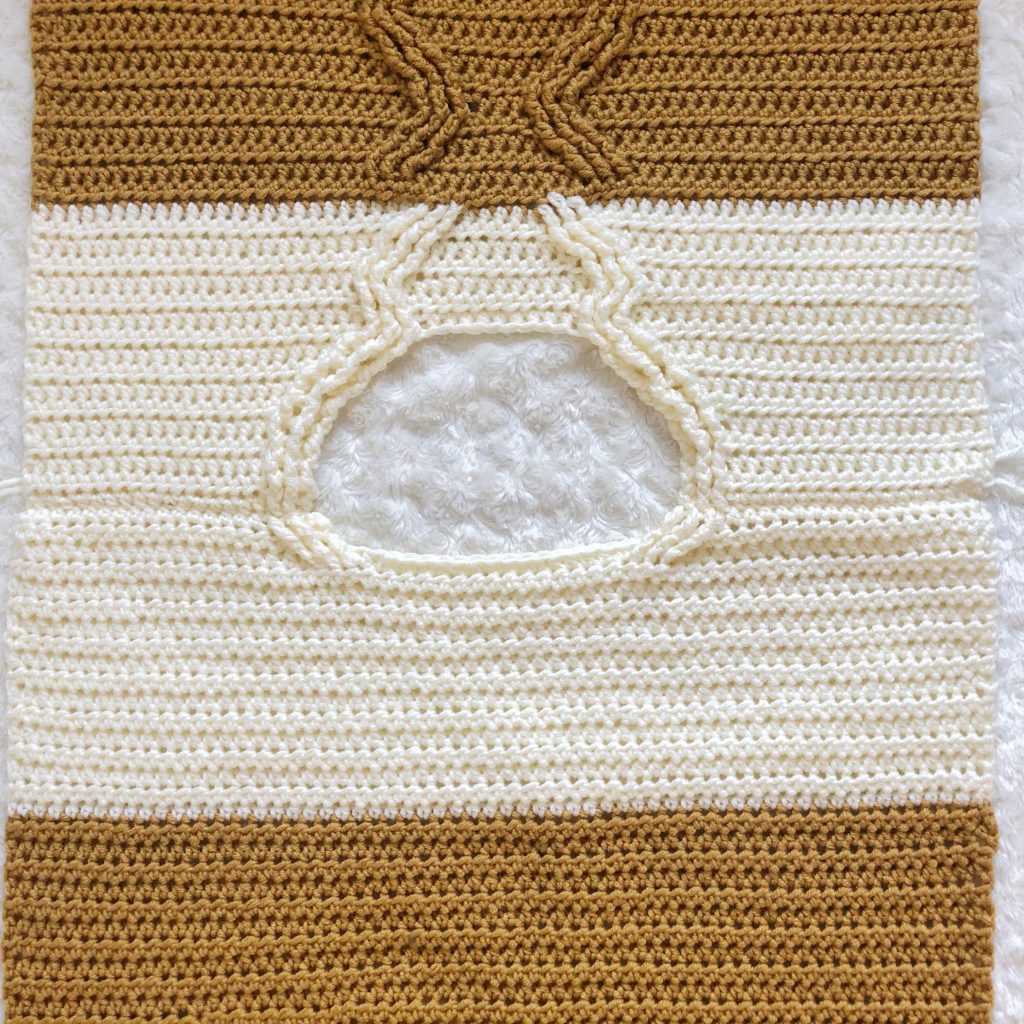
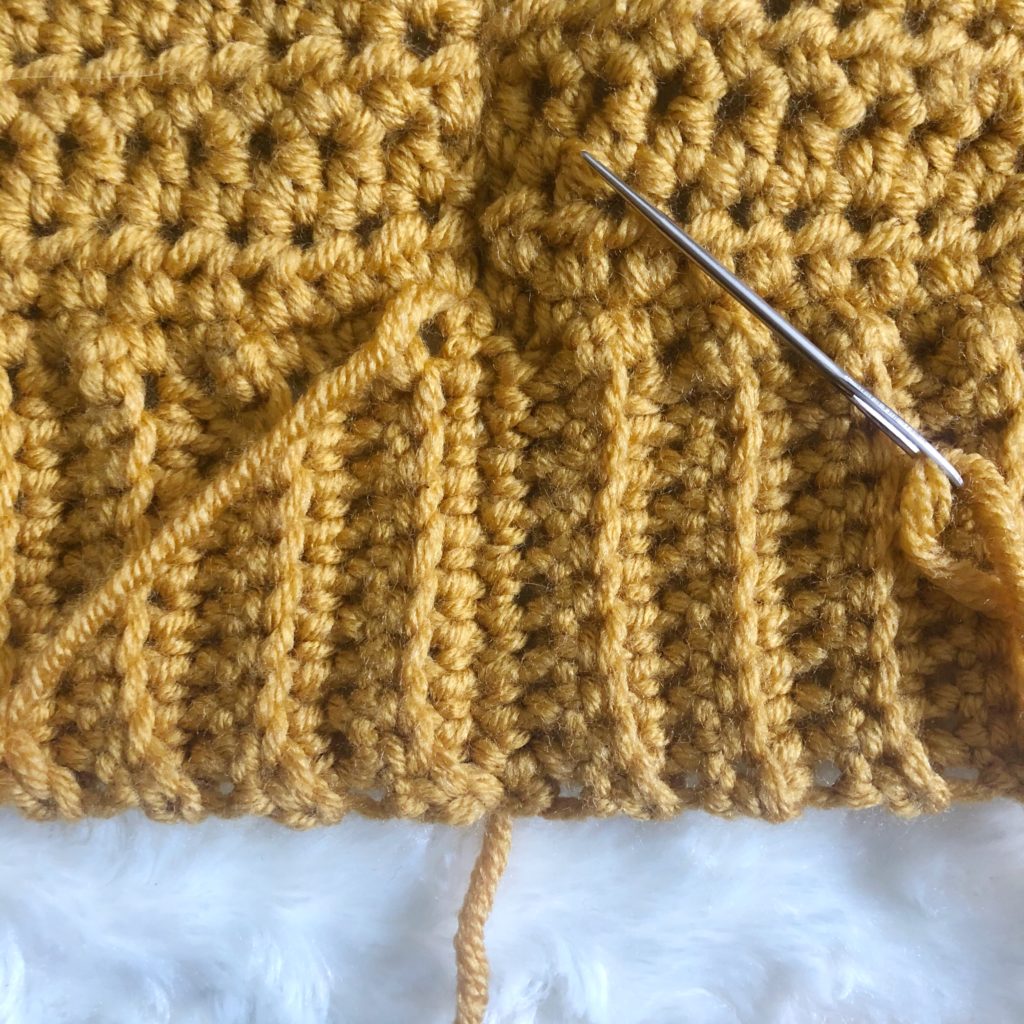
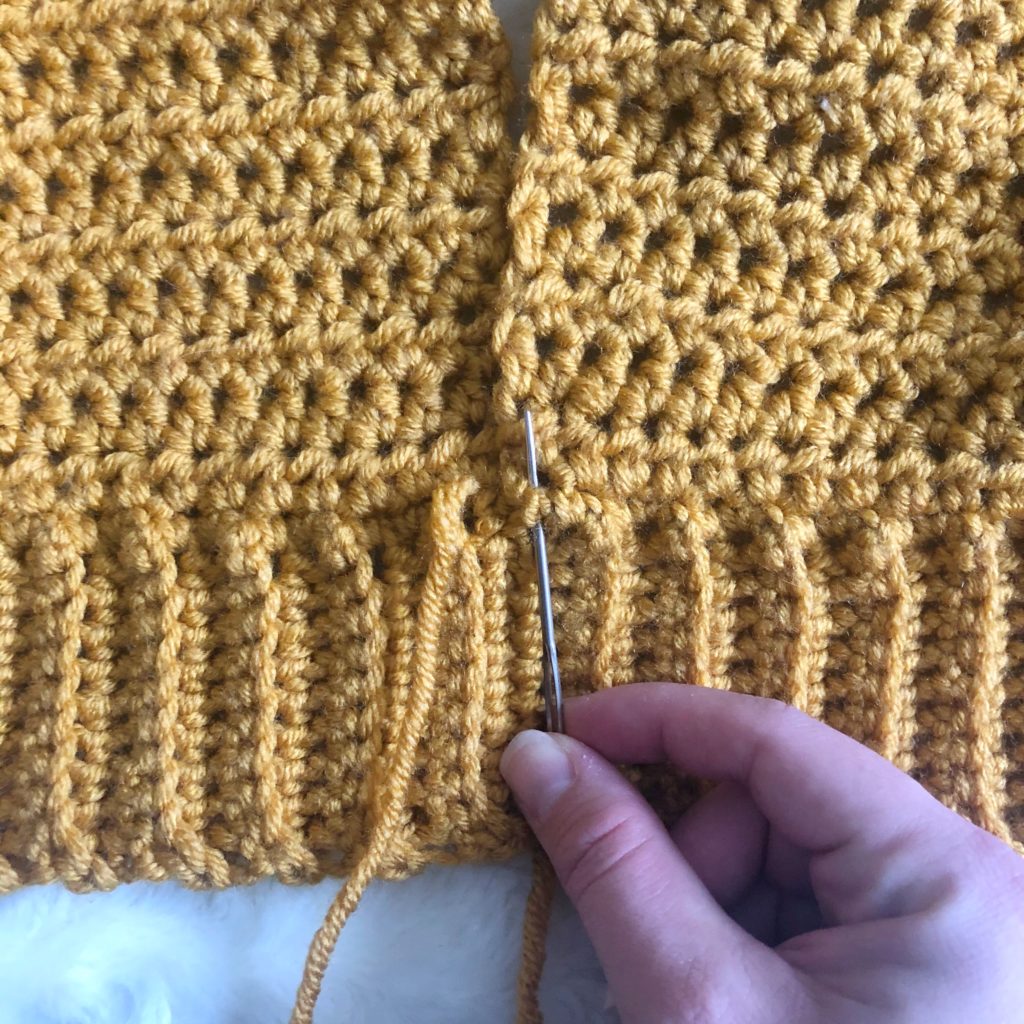
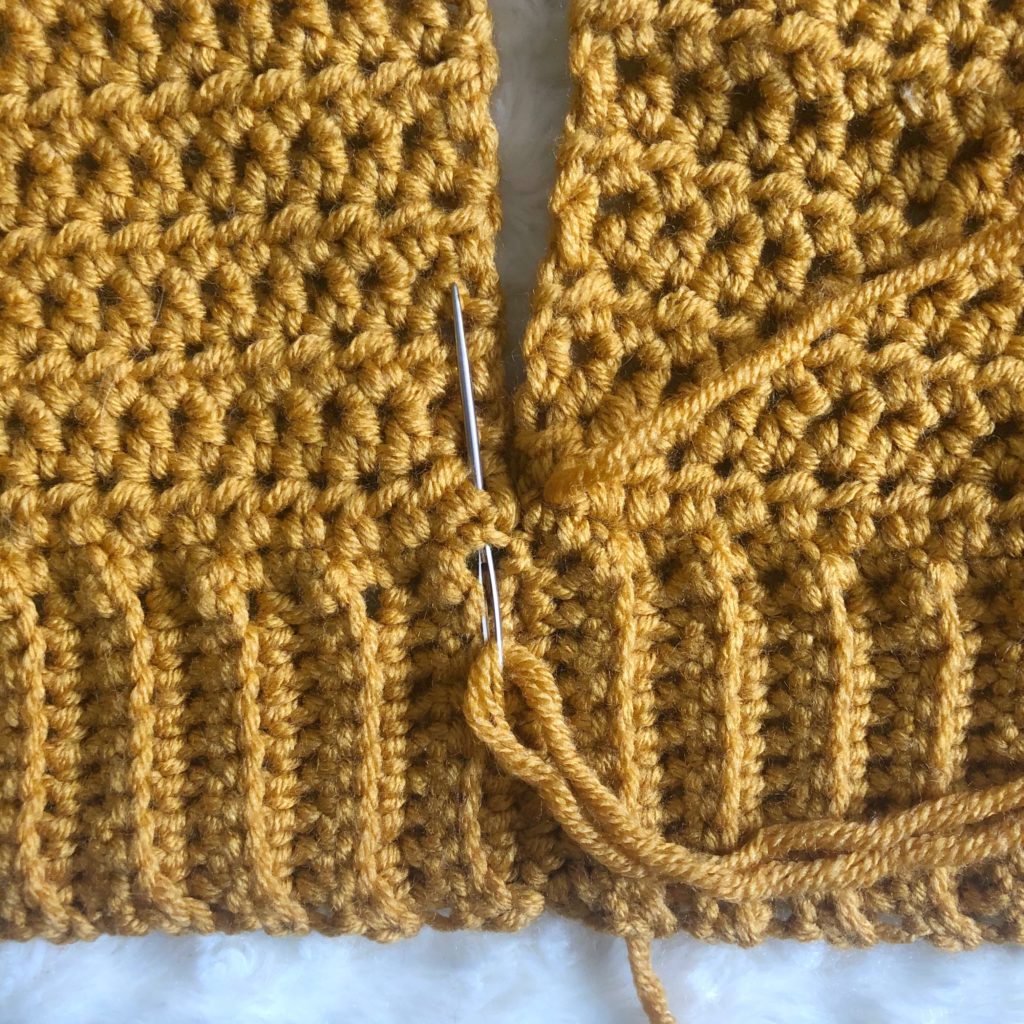
Seaming
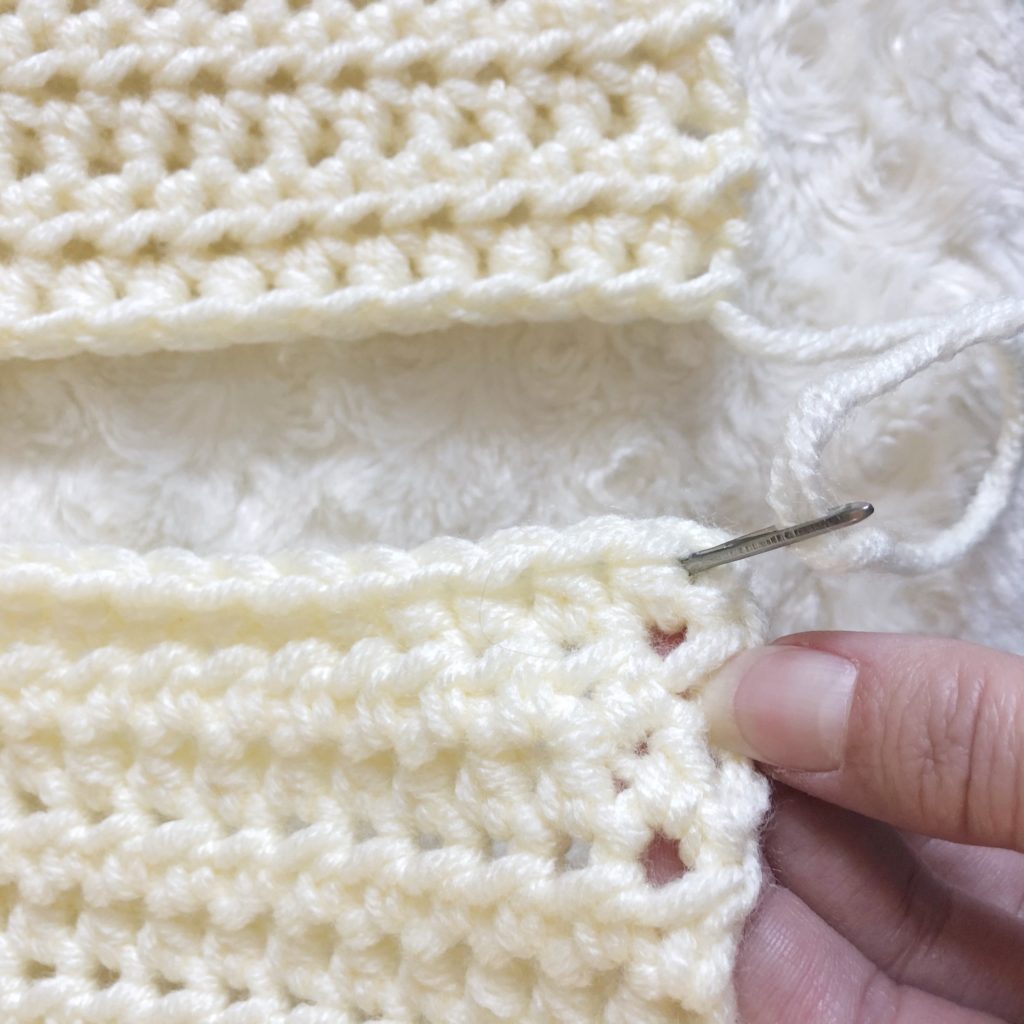
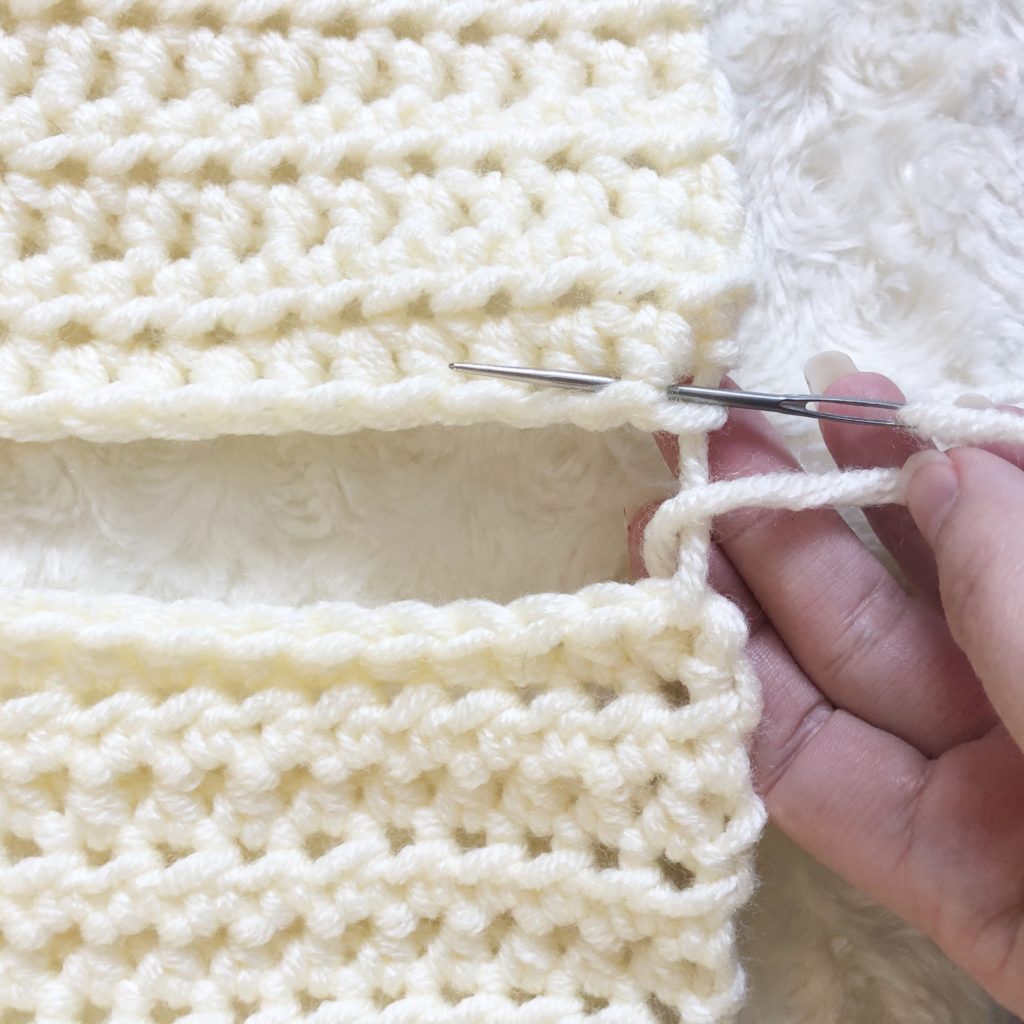
Shoulders
Lay both panels right sides up top edges touching. Using the mattress stitch, stitch together 14 (16, 18, 20, 23, 26) stitches from the outer edge to the center on each side.
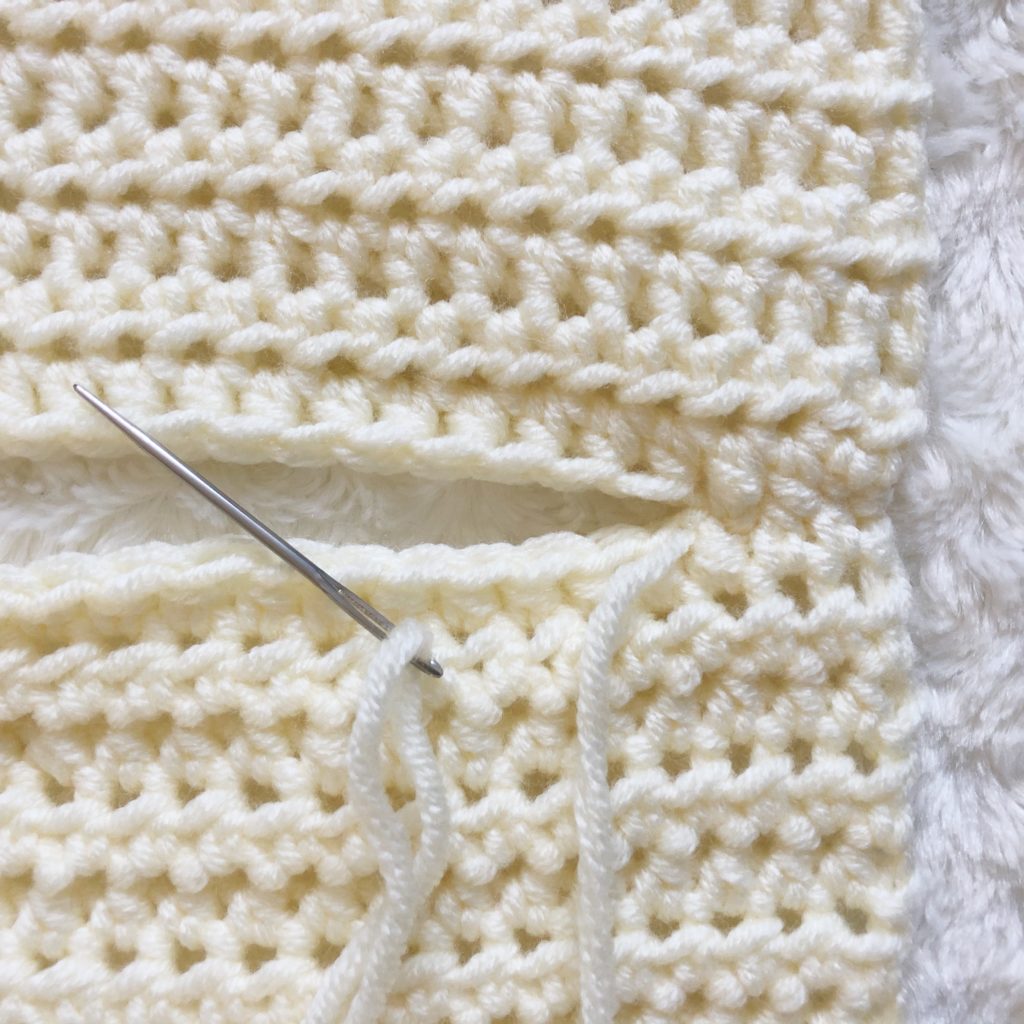
Sides
With RS of the panels facing up, join yarn (approx 1 yard in length) to one corner of the bottom of one panel. Using the mattress stitch, seam the side up to Row 28. Be sure that the rows are lining up as you go.

Repeat on other side.
Sleeves
Turn the sweater so that the bottom (ribbing) is on your right, the neck is on your left, and the armhole is at the top of your work.
Size XS: Join CC to Row 32.
Sizes S, M, L, XL, XXL: Using the MC tail from seaming the side, CH 1 in Row 31, 30, 29, 28, 27.
*Work Row 1 into the end of each row from the body panels.*
Size XS
Row 1: Work 1 SC in the end of each row around the circumference of the sleeve, join MC at the end of the row. (34)
Sizes S, M, L, XL, XXL
Row 1: SC 1, 2, 3, 4, 5 in MC, switch to CC, SC 34, switch back to MC, SC 1, 2, 3, 4, 5. (36, 38, 40, 42, 44)
*It gets tricky at the shoulder seam. Be sure to place a SC in each row where the seam is. *
Continue the rest of the sleeve in MC.
Row 2-3: CH 1, turn, HDC in each stitch around. (34, 36, 38, 40, 42, 44)
Row 4: CH 1, turn, HDC DEC, HDC in each stitch around until 2 stitches remain, HDC DEC. (32, 34, 36, 38, 40, 42)
Row 5-7: CH 1, turn, HDC in each stitch around. (32, 34, 36, 38, 40, 42)
Row 8: Repeat Row 4. (30, 32, 34, 36, 38, 40)
Row 9-11: CH 1, turn, HDC in each stitch around. (30, 32, 34, 36, 38, 40)
Row 12: Repeat Row 4. (28, 30, 32, 34, 36, 38)
Row 13-15: CH 1, turn, HDC in each stitch around. (28, 30, 32, 34, 36, 38)
Row 16: Repeat Row 4. (26, 28, 30, 32, 34, 36)
Row 17-19: CH 1, turn, HDC in each stitch around. (26, 28, 30, 32, 34, 36)
Row 20: Repeat Row 4. (24, 26, 28, 30, 32, 34)
Row 21-23: CH 1, turn, HDC in each stitch around. (24, 26, 28, 30, 32, 34)
Row 24: Repeat Row 4. (22, 24, 26, 28, 30, 32)
Row 25-27: CH 1, turn, HDC in each stitch around. (22, 24, 26, 28, 30, 32)
Row 28: Repeat Row 4. (20, 22, 24, 26, 28, 30)
*For sleeves that stop at the wrist, stop here and proceed to ribbing.
*For thumb-length sleeves, proceed as normal.
Row 29-31: CH 1, turn, HDC in each stitch around. (20, 22, 24, 26, 28, 30)
Row 32: Repeat Row 4. (18, 20, 22, 24, 26, 28)
Row 33-40: CH 1, turn, HDC in each stitch around. (18, 20, 22, 24, 26, 28)
Ribbing
Change to size USK10.5/6.5mm crochet hook.
Row 1: Turn, CH 11, SC in 2nd CH from hook and in each CH, SL ST to the first HDC of the sleeve. (10)
Row 2: SL ST to next HDC, turn, SC BLO in each SC from previous row. (10)
Row 3: CH 1, turn, SC BLO in each SC from previous row, SL ST to next HDC of the sleeve. (10)
Row 4-18, 20, 22, 24, 26, 28: Repeat Row 2-3 until you have the correct amount of rows.
Leave a long tail (approx 1 yard), Cut yarn, FO.
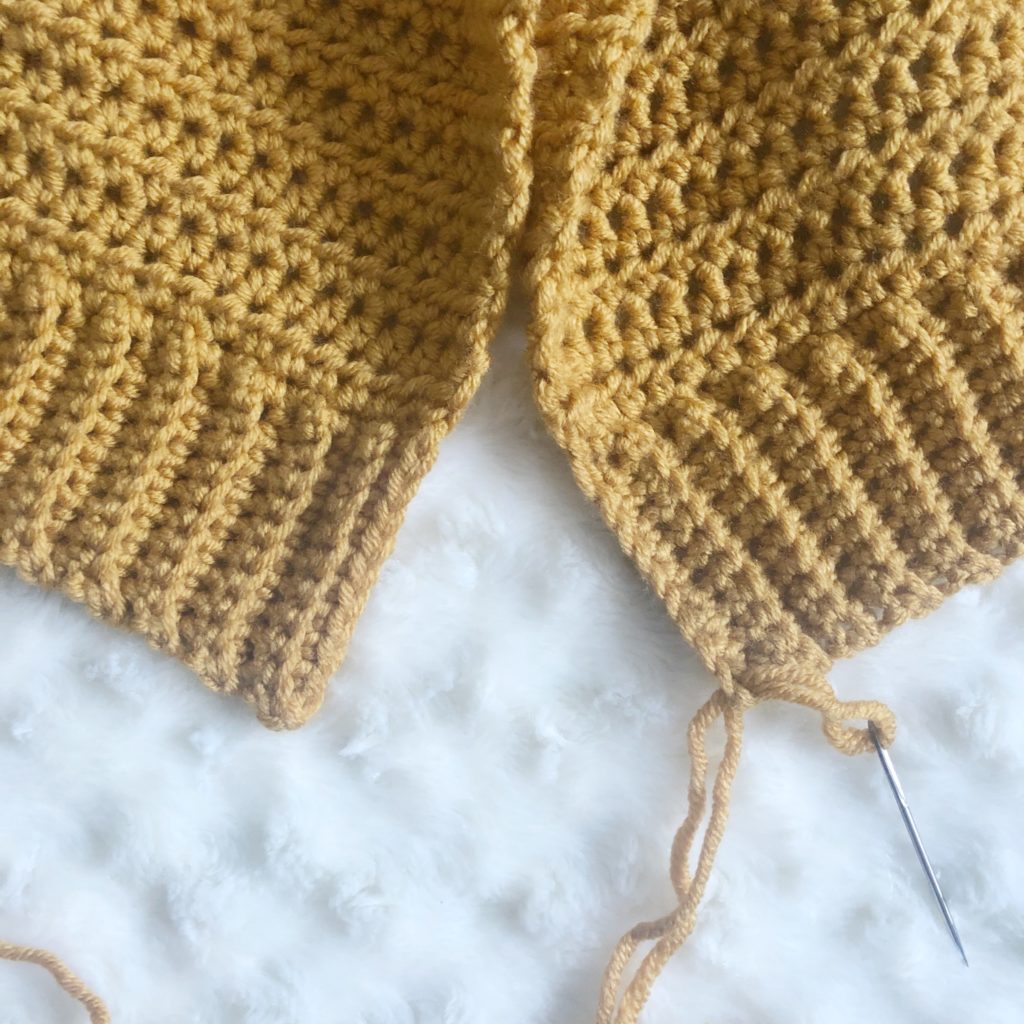
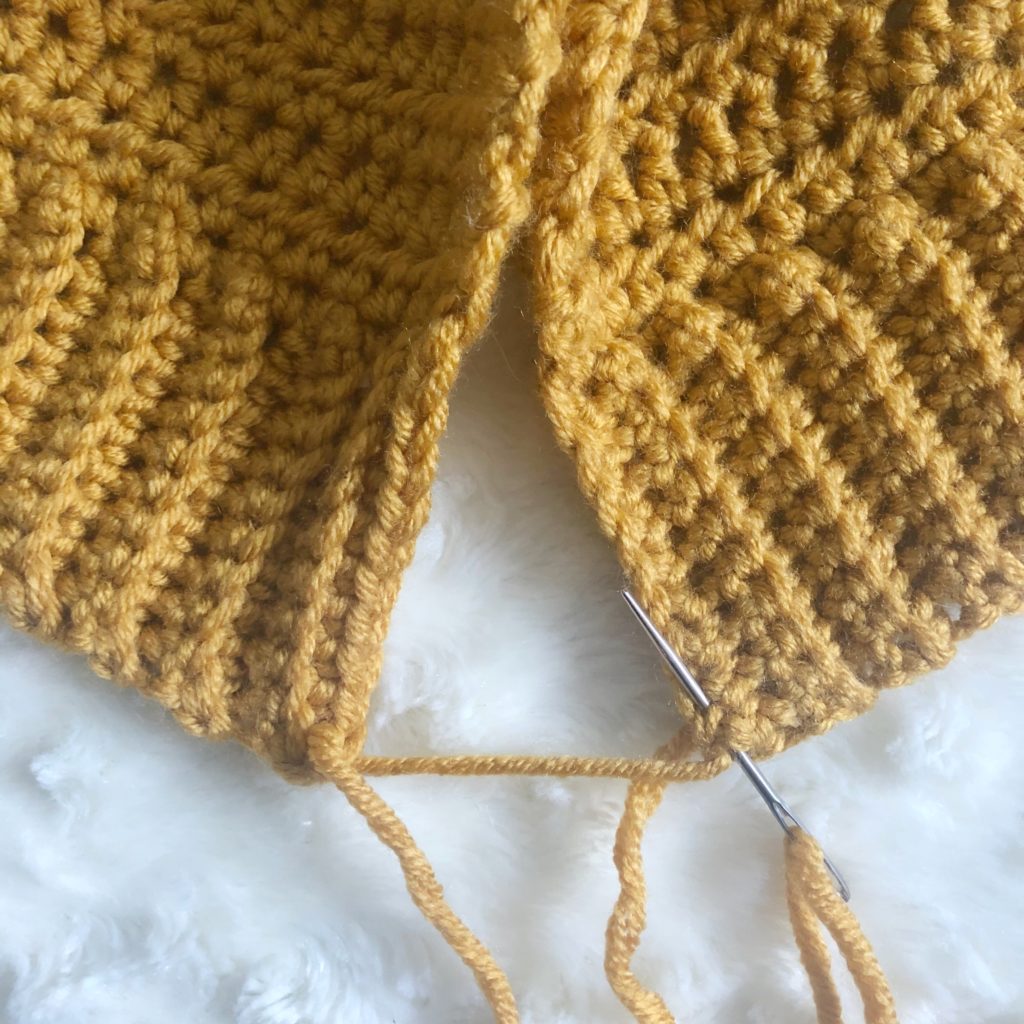
Repeat on other side for the second sleeve.
Using the long tail, seam the sleeve together using the mattress stitch technique as described earlier for the shoulder and side seams.
Collar
This step is optional. If you like a wide/off-the-shoulder neck, you can leave the collar as is. If you like a tighter neckline, proceed to instructions below.
Join yarn to the center back of the neckline. Work a SL ST in each stitch around the neckline. When you get to the post stitches, work the SL ST around the back of each post. Cut yarn after the last SL ST is worked. Using your tapestry needle, weave the tail under both loops of the first SL ST and then through the V of the last SL ST for an invisible join.
Weave in all ends.
If you make this sweater, please share it! I would love to see your work! You can tag me on Instagram and Facebook @theplushpineapple. Use the tag #theplushpineapple.
“Much love, sunshine, and pineapples”
Sarah
The photographs and pattern contained in this document are the property of A Plush Pineapple. Unauthorized reproduction, in whole or in part, or distribution of this pattern or content is prohibited. ALL FINISHED PRODUCTS created using this pattern may be sold locally or online. If selling finished products online, please give my blog credit for the pattern by posting a link to my website.